7 COOLING YOGA POSES TO BEAT THE HEAT THIS SUMMER
Summer is here! Gone are the days when summer was about pleasant sunshine and soothing warmth. Now, it is about the extreme heat that builds unease and irritability in our bodies. Continuous sweating, burning eyes, and parched throats become your constant companions this season. But, don't worry I am here to guide how you coll your body with some yoga asanas. Here you go!

YOGA TO REDUCE BODY HEAT
Yoga reduces your body heat in a natural manner. The thermal energy from the metabolic activities of your body causes body heat. Follow these yoga poses to cool down your body.
- Tadasana (Mountain Pose)
- Baddha Konasana (Butterfly Pose)
- Anjaneyasana (Crescent Pose)
- Simhasana (Lion Pose)
- Ustrasana (Camel Pose)
- Bhujangasana (Cobra Pose)
- Savasana (Corpse Pose)
TADASANA

How to do Tadasana yoga pose (Mountain Pose)
- Stand with your feet slightly apart and make sure that your weight is balanced equally on both feet.
- Inhale, raise your arms above your head, interlock your fingers with palms facing upwards.
- Raise your shoulders up towards your ears and on an exhale, roll your shoulders back and down your spine, opening your chest and straightening your posture.
- Relax all muscles in your face, including your tongue.
- Relax your eyes and maintain a steady gaze.
- Come back to normal position and relax.
BADDHA KONASANA

Getting into Baddha Konasana:
Sit with your legs straight out in front of you. Raise your pelvis with a block or a blanket if your hips are tight. Bend your knees and pull your feet towards as close to your pelvis as you can, with the soles of the feet touching each other. Drop your knees towards the floor and push the feet together. With your index and middle finger and thumb grab the big toes of each foot. Lengthen through the front of the torso to the sternum as you pull your body down towards the floor.
The aim of the posture is to get your knees on the floor and your head in front of your feet with your torso flat over your legs. There is no need for this to happen overnight; you will get benefits from every stage of this pose. As you fold forward in this posture, lead with the heart until you reach the edge of your flexibility then let the back round and drop the head. Never force your knees down. Instead, release the heads of the thighbones toward the floor. When this action leads, the knees follow. Stay in baddha konasana for 1 to 5 minutes or at least 20 breaths, breathing constantly in and through the nose and you gently release into the pose.
ANJANEYA ASANA
- Start the pose by getting into the pose of Adho Mukha Svanasana. When you are completely in the pose, breathe out and keep your right foot in a forwarding direction beside your right hand.
- Note that your right knee and your ankle are in a parallel line.
- Now slowly lower down your left knee and placed it on the ground or floor, right behind the hips.
- Breathe in, and raise your torso; after that lift your arms above your head, in a way that your biceps are touching your ears, and combine your palms and make a Namaskar gesture.
- Breathe Out. Let your hips relax and forward, specified you are feeling a decent stretch within the frontal region of your leg and therefore the hip flexors.
- Keep your tailbone towards the floor. Stretch your lower back as you have interaction with your spine. Stretch your arms additional behind so your heart is pushed up. Look behind as you progress into the delicate acrobatic stunt.
- Remain in the pose for 15 to 30 seconds. You may also lift up your knee of the back leg off the floor to perform a full Crescent pose.
- For releasing the pose, keep your hands back to the floor and get back. Repeat the same process with your opposite leg also.
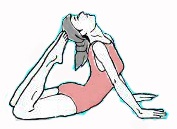
SIMHASANA
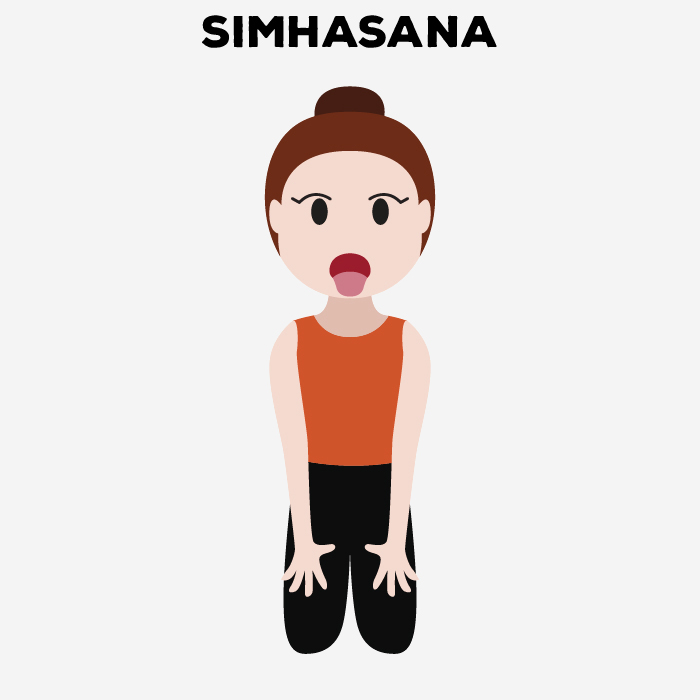
Getting Into Lion Pose:
Begin by kneeling on the floor with knees shoulder-width apart. Cross your right ankle over your left and carefully sit back on your heels. Make sure your feet are pointing outward and your calves are kept flat on the floor. Lift your chest up just enough that you are not slouching and your spine is fully straightened, but don’t over-arch your back.
Now, place both your hands on top of your knees. REMEMBER: don’t slouch as you do this. Widen your palms and press them firmly against your knees. Splay your fingers like a lion’s claws. Inhale deeply through your nose.
This next step is the focal point of Simhasana, but it can also be quite challenging. If you struggle here, be sure to practice your movements in coordination with each other. So, simultaneously do the following:
- Lower your jaw and open your mouth as wide as possible
- Stretch your tongue out and curl its tip down toward your chin
- Open your eyes wide, looking upward
- Focus your eyes in between your eyebrows or on the tip of your nose
- Contract the muscles at the front of your throat
- Activate your hands, splaying your fingers further out
Now, hold this position and exhale slowly through your mouth. Feel the air pass over the back of the throat as well as the contraction of your throat and neck muscles. You should make a distinct “haaaaa” sound as you exhale.
Don’t forget to give your best lion roar. In fact, roar two or three times then retract your tongue. Relax your face, mouth, eyes, throat, and hands. Cross your ankles the opposite way and repeat Simhasana.
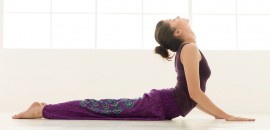
USTRASANA
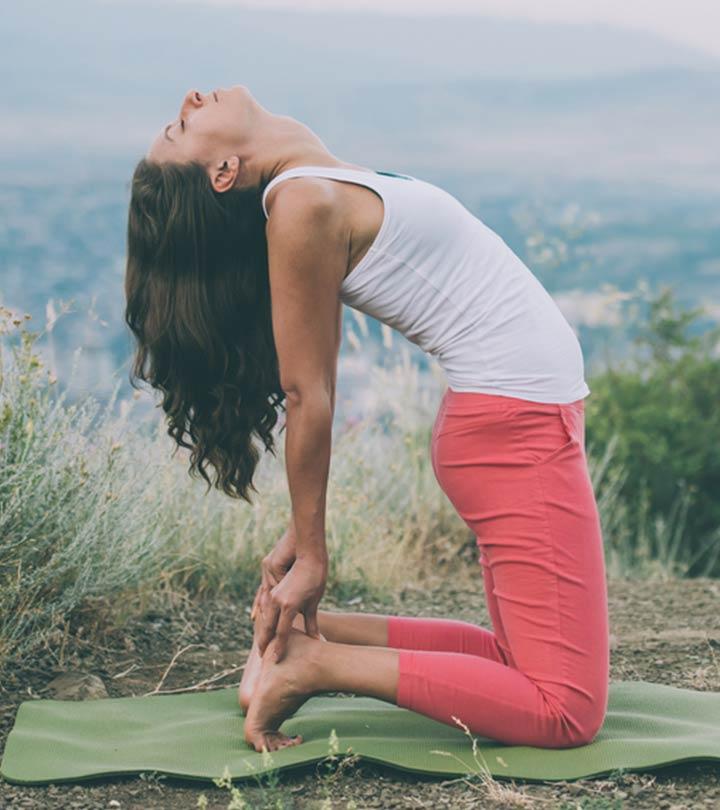
- Sit on the floor stretching your leg and keeping your spine erect keeping palms on the ground side by the buttocks.
- Bend your leg by the keens and sit on your heels placing the buttocks between the heels, the right big toe overlapping the left.
- Kneel on the floor keeping your knees in line with the shoulders and sole of the feet facing the ceiling.
- Keep your hand on your thighs.
- Inhale and arch your back and place your palms on the heels of the feet.
- Keep your arms straight.
- Do not strain your neck keep it neutral. Let your neck be free.
- Stay in this final position for a couple of breaths or as much longer as you can.
- Breathe out and slowly come to the normal position withdrawing your hands from the fe
BHUJANGAASANA
- First, lie down on your stomach. Your forehead should be Relax and resting on the ground.
- Keep your legs join together and keep your arms near the body.
- Keep your hands beside the chest, palms pointing to the ground.
- Now inhale and slowly raise your upper part of your body along with your chest, till the navel. (Don’t do a jerky movement. Be gentle and slow).
- Now exhale and bend your spine backward.
- Now release your neck.
- Try to hold this position for thirty seconds.
- Now gently elevate your legs along with bending knees, and try to place your feet as near the head as doable.
- Try to touch your head with your feet’ toes. (as much as you can).
- Try to hold this position for thirty seconds.
- Breathe out (exhale) and come back to the initial position. ( slowly down your legs first, and also the torso.
- Now take a rest for sixty seconds.
- Repeat this process for 4 to 5 times in one session.
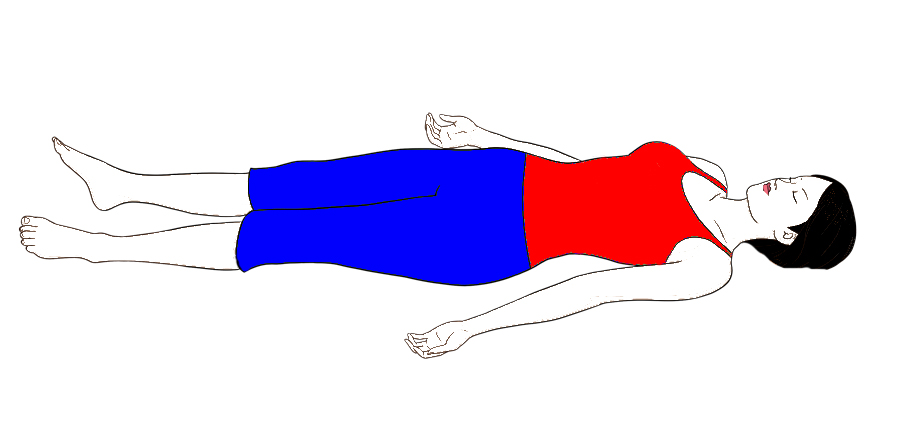
SAVASANA
- First, lie down straight on your back on the floor. Put or maintain a distance of 1 foot in between your legs. Keep your both hands open, with palms facing upwards, at some distance away from your thighs.
- Now slowly close your eyes keep your neck erect and relax your whole body.
- After that slowly – slowly take deep breaths about 5 to 6 times. At this time, visualize each and every part of your body in your mind with resolution and the feeling that each and every organ is relaxed and free from all stress.


Comments
Post a Comment
If you have any doubts plz let me know.